Your source for fruit and vegetable news
Latest News Blogs/Links Features Classifieds Home. Farmers Markets. Market News. Recipe Corner. About Us. Garden Photos. Archives.
Click for Windsor, Virginia Forecast
Recipe Corner

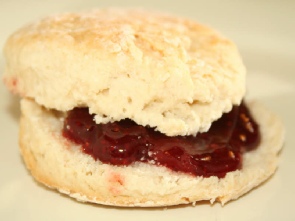
Make strawberry preserves with freshly-picked berries

With extra strawberries on hand, make some preserves for biscuits, pancakes or a chicken entrée topper.
Strawberries, a source of Vitamin C, are in season just about everywhere now, and if you’ve picked more than you can eat in a day or two, making strawberry preserves might be a good way to use the extra berries.

Here’s what you’ll need to make this simple strawberry preserves recipe:

8 cups of strawberries (caps removed and sliced)
6 cups of sugar
¼ cup of vinegar
6-7 (8 ounce) jam jars, lids and bands
1 large, deep pot or a processing pot with a jar rack

Place the strawberries and sugar in a large pot or Dutch oven and allow the two ingredients to meld for about 2-3 hours until liquid forms and nearly covers the strawberries.

Now that you have liquid, add the vinegar and heat the strawberries on medium until they begin to boil and the sugar dissolves (about 15 minutes). Once the sugar has dissolved, first remove any foam on top with a metal spoon. Now, remove the strawberries from the syrup and place them in a separate bowl. Continue cooking the syrup until it becomes thick. This process can take about 15-30 minutes.

As the strawberry mixture cooks, place your jars in a large pot of water and heat them – not to the boiling point, though. Also, heat the lids, which have a rubber section around the edge in a separate small sauce pan, but don’t boil them.

When the sauce has thickened (You’ll know when it’s thick because it no longer will have that liquid appearance when spooned, but at this point, it won’t look like the finished jam.), place the strawberries in the syrup and stir.
Now, you can spoon the mixture into warm and sterilized jam jars.

To start, remove the jars from their pot, making sure no water remains inside of them. Spoon the strawberry mixture into the jars, and leave ¼ of an inch space at the top of the jars.

If air bubbles appear in the mixture, use a spoon and move it downward into the jar to release the bubbles. Wipe the rims of the jars with a damp cloth to remove any mixture. Place the lid on and screw on the band.

Once filled, the jars will need to be processed* in the pot for about 5-15 minutes with about one or two inches of water above the jars. Cover the pot with a lid. Begin timing the processing stage once the water begins to boil. After boiling, unless you have more jars to process, allow the jars to sit in the water bath to cool a bit. Then, remove the jars.

Place your jars together on a table or counter space and allow them to cool. The lid should seal, and if you haven’t canned anything before, you’ll notice that the center of the lids will pop downward as the sealing process completes.

The sealing process will continue with one or two jar lids popping at a time when they seal. If you end up with a jar that doesn’t seal, you can reprocess or place those in the refrigerator for immediate use.

If you’re in a hurry to try your preserves, wait at least 24 hours.

For more information on canning, visit Ball® at Fresh Preserving:

* Be sure to complete the processing step. Processing the preserves in the jars assures that any existing bacteria are killed.

  – Bobbie Whitehead
FREE GAME - Text Twist 2
Your Ad Here